As my Plex setup and my Home Theater have evolved I am always looking for new ways to improve the usability and function of the combined experience. I actually did this a while back and just now got to documenting it, but the requirement I had was to operate the lighting based on Plex Media Player actions like Play/Pause. My idea if all the lights were on as people came into the theater room, I wanted the lights to lower when a movie was initially started. In addition if we needed to pause it I wanted one set of lights at the floor/stair level to rise up to people can see where they are going without turning up all the sconces. Once the movie starts to play again and people are back int their seats, I wanted them to dim back down and return to low level light in case they needed to leave for another reason without fully pausing. Sounded simple enough in my head, let’s see how I did it.
What I Used to Automate Lighting with Plex Playback
There are a few systems I needed to couple together to make this work, and fortunately I had all of them available out of the gate. The main systems I needed to combine were:
- Plex Server
- Plex Media Players
- ShieldTV
- AppleTV
- Both using the name ‘Media Room’
- Lutron Caseta Dimmer Switche
- Tautulli
- IFTTT (although there are other methods)
The first thing to note is that with two options for Plex players they use the same name. This is fine because when they are registered to the Plex Server, they can share a name as they are different player platforms, and this as you will see made things easier. The basic control communication path(s) look like this:
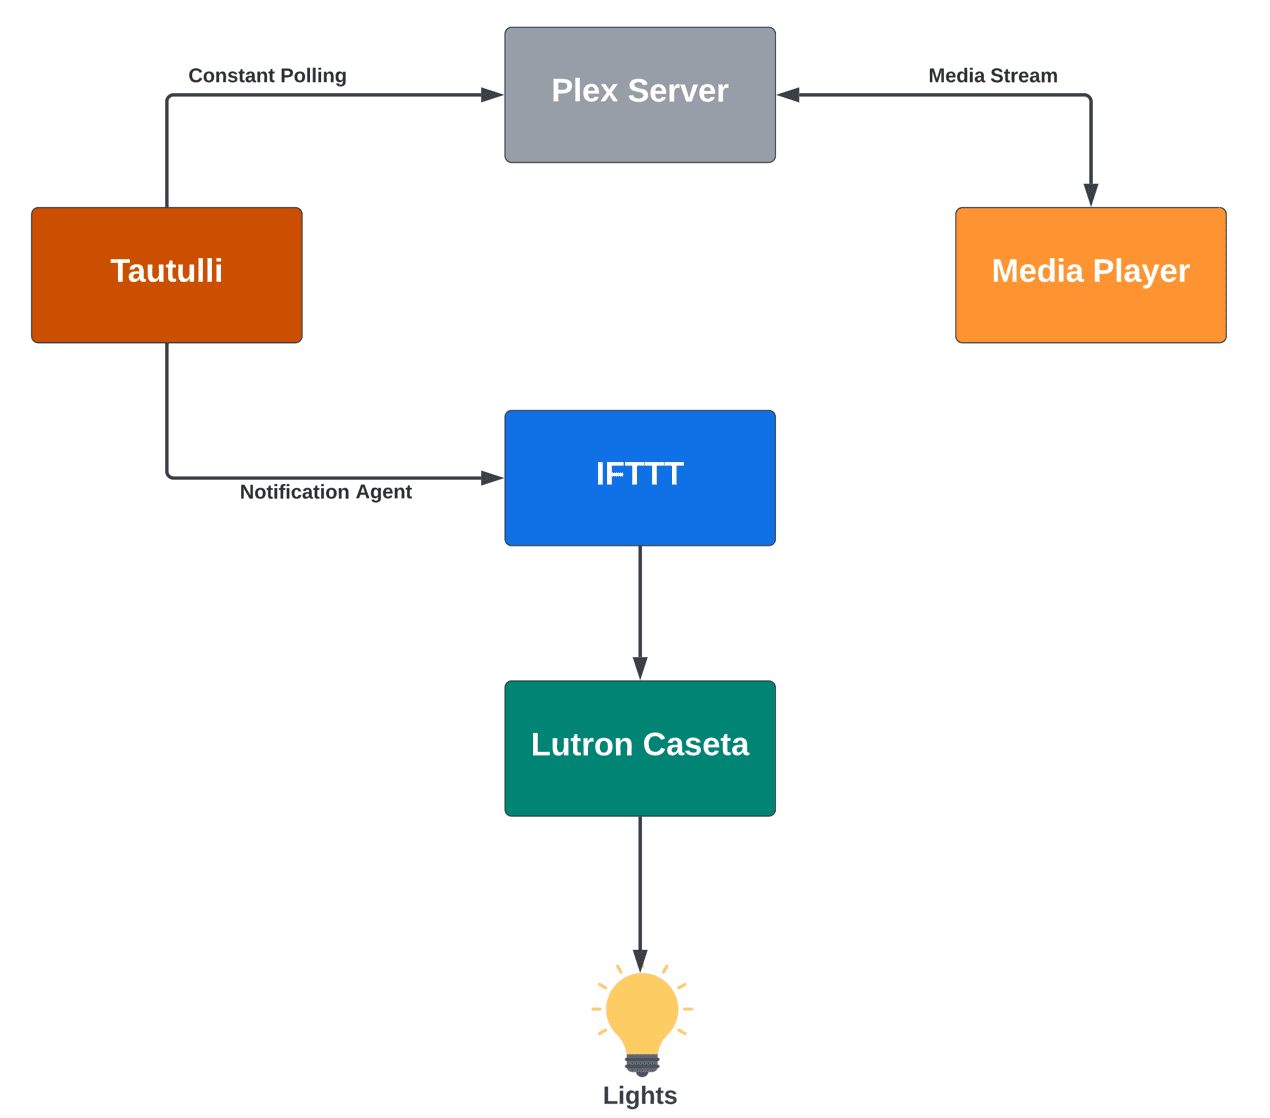
As you can see the Plex Player is not “In Band” with the workflow. Tautulli monitors the Plex Server constantly and can send custom “notification triggers” based on certain criteria. In my case the notification is sent to IFTTT which in turn has a connection to Lutron. As I mentioned there are other options for sending from Tautulli to a system to perform the lighting actions. Let’s look at the IFTTT Setup first as information from that is needed in the Tautulli trigger .
IFTTT Webhook Service Configuration
The first thing with IFTTT Webhooks that is a little confusing is as a user when you enable the webhook service, is you basically get ONE service key. From there you need to read the documentation to see how you use the service. Be sure to click on the “Documentation link” and you will get the main things you need to know for Tautulli.
- Your Service Key
- Event Name (which you define on the actual IFTTT flow and then USE later
The flow for a POST or GET if you wanted to test it is simply the string below, but we will not need this for Tautulli
https://maker.ifttt.com/trigger/{event}/json/with/key/<your_key_here>IFTTT Flow Configuration
Once you have your Webhook service enabled and your service key for later you can create the IF / THEN flow for the lights. This is really the easy part and looks like this.
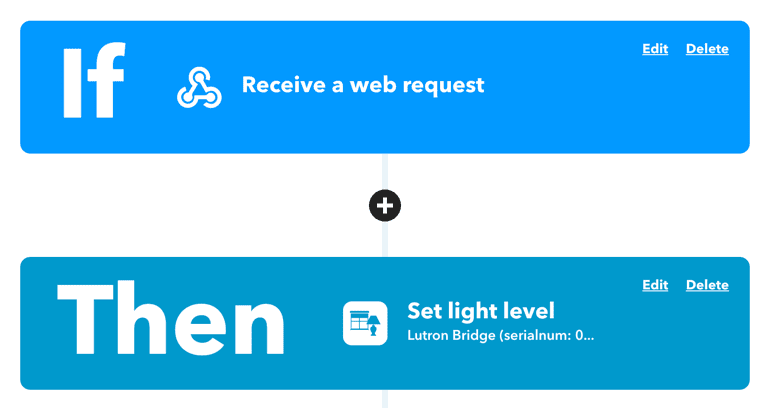
For separate play and pause actions like I did, you will need TWO applets. For the IF select the “Receive Web Request” and use a configuration similar to these for each different applet
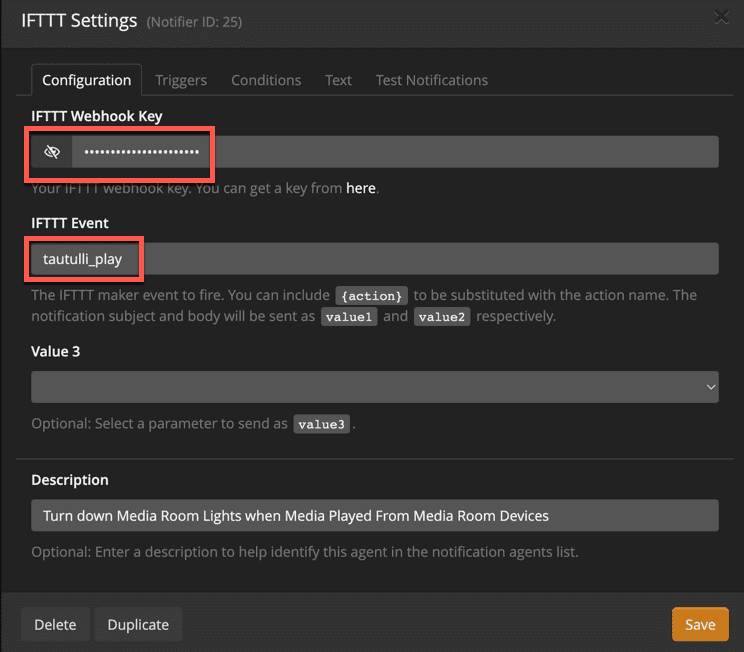
Event Name: tautulli_play
Event Name: tautulli_pause
For the THEN aspect you can set the Lutron light controls as you wish. Once you have these you can move to the Tautulli Event Notifications
Tautulli Event Notification Configuration
It’s worth noting I am not going to cover how to connect Tautulli to your Plex Server, that is well documented. This assumes that connection is there. This you will need as many event notifications as you made IFTTT Applets. In my case I have two but I will show one for illustration for the “Play” action only. There are three sections you need to configure
On the first tab you insert your Webhook key from the IFTTT service documentation page. You then add the “Event Name” from the applet you want to trigger under “IFTTT Event”. As you can see the names don’t exactly match up across platforms which is where it took a bit to be sure it was right.
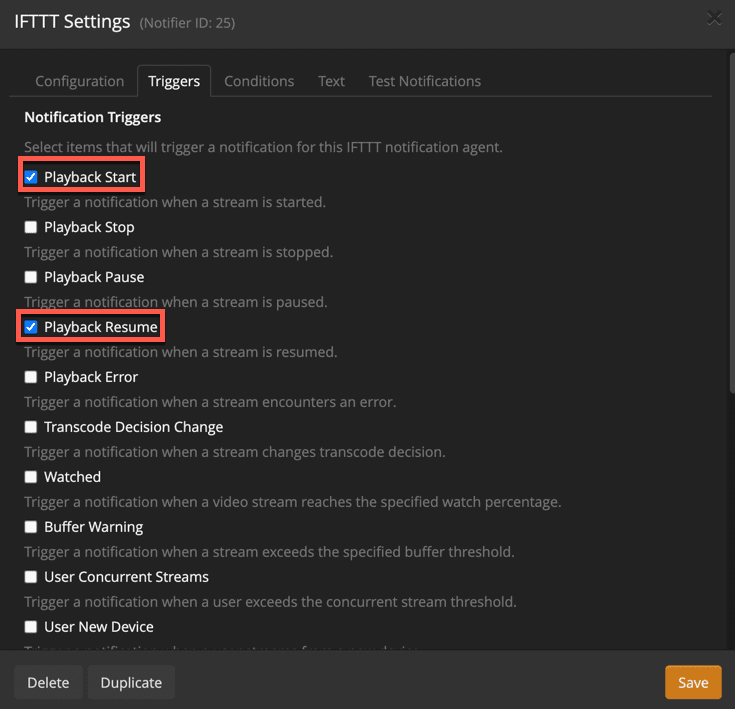
Next you set the triggers. In my case for dimming the lights both on a NEW playback and a resume from pause the two options below were needed.
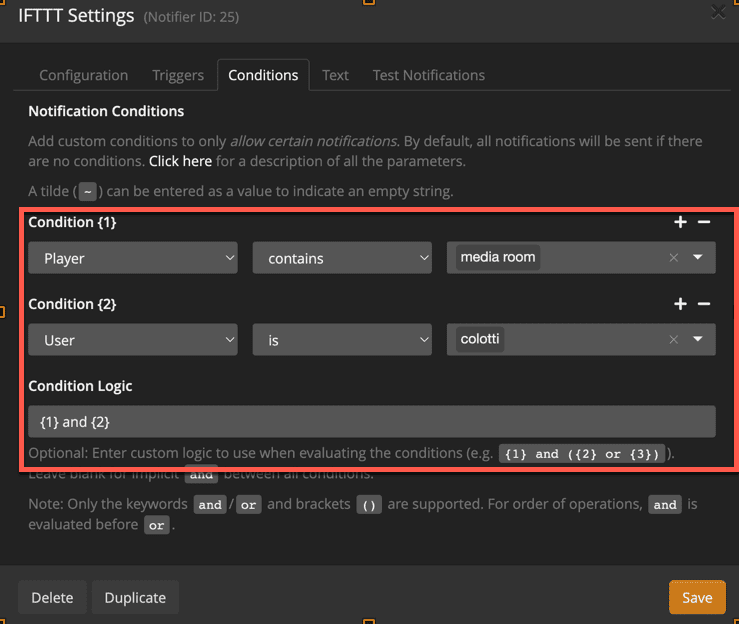
Lastly, I needed to set the conditions to ONLY trigger with the player name includes “media room” and on my username. This prevents the trigger from firing for every user (which would make for interesting lighting games), and other players like my iPad or FireTV. I wanted to be very specific here.
Once these are set you can test the trigger. It should sent the IFTTT command so you can test the lights. I repeated this for the “Pause” action to send the trigger to the other applet since these really are a 1:1 setup with different conditions.
Automate Lighting with Plex Playback Conclusion
Once you get this setup you can make as many tweaks and changes or additions as you like but this was one way to tie the media playback or pause to light functions in my media room. It has worked great for some time, and only needs adjustment if I change media players. I have to remember to name the new player “Media Room” so the conditions will work.