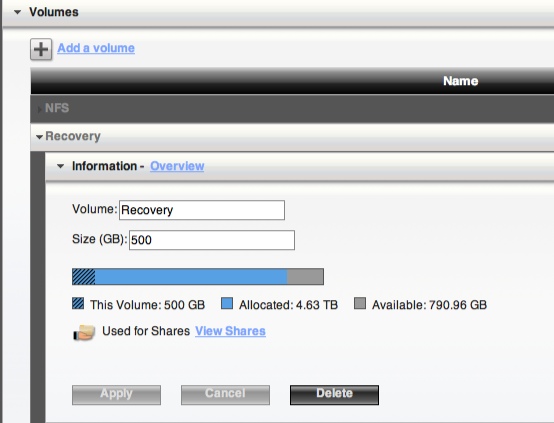
This was amazingly easy once the latest update was installed onto the device so it worked with OSX Lion. The first thing I noticed is you will want to do a couple of things before you enable it on the device. By default there is a single volume called “Shares” on the device with most commonly used shares. This is okay, but Time Machine will not overwrite until it fills up the backup space. So with an 8TB unit, that’s a lot of backups! So what I did was I actually removed all the original Drive settings so I could create a brand new storage pool. This was also needed since I added two drives to the original two that it came with so I wanted to rebuild it anyhow. I have heard you cannot create new Volumes unless you start from scratch with a clean storage pool to work with. Then I went into Storage and Disk setup and created a new Volume called “Recovery”. I set this to about 500GB for now since you can adjust it as needed. I realized this was never going to overwrite and we have two MacBooks in the house so I figured this was a good idea. This is a great feature of the PX4 that you can create new volumes for a purpose like this.
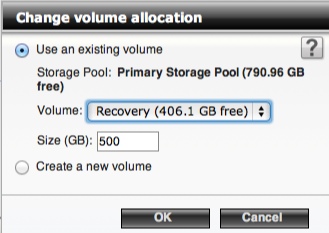
Then I went and re-created the TimeMachine Share, but I assigned it to the new Volume. This ensures that Time Machine will not overtake the PX4’s total space. The trick is to make sure you click “Change Volume Allocation” or the share will go to who knows which one.
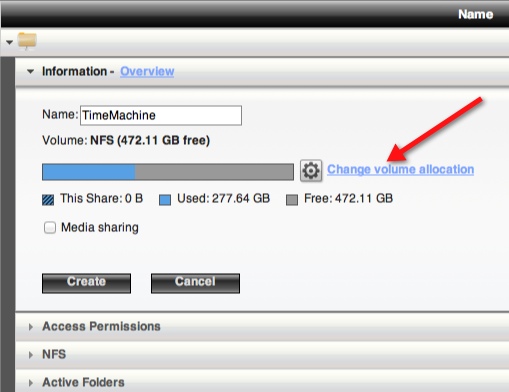 Once you click change allocation you will see a window where you can pick your newly create Volume
Once this is completed you can enable Time Machine under the Backup section and point it to this share. You also need to do nothing on your Mac except pick this folder when you configure. I found it worked without creating any connections to the mac with the Storage software or creating MAC address based folders.
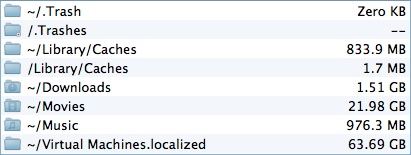
Lastly you will want a decent list of exclusions especially if you run VMware Fusion. Below is my personal list, but if you are using your Mac as a personal laptop you may want to grab Media folders. I chose not to along with my Virtual Machines. Those you MUST exclude as they change every hour and will fill your backup pretty quick.
This setup should also work for an IX4 Cloud Edition as well, since the Time Machine setup on the newest firmware is pretty much the same as the PX4.
 Chris Colotti's Blog Thoughts and Theories About…

