


![]()
- Deploy the vCloud Connector Server on Premise initially
- Deploy vCloud Connector Nodes to all connection points you need access to
- Provider clouds like Virtacore will have a single portal, but multiple actual clouds
- The vCloud Connector Server today does not work behind NAT, so deploy on a local subnet
- On Premise components can live outside the cloud, hosted nodes will be inside the provider cloud
- Configure server and node passwords and create real Certificates for SSL between server and node
- Using the portal still requires you have local access to the vCloud Connector Server via LAN or VPN if it is hosted on premise
Once you have the components all setup the fun can begin in moving the workloads. Something to remember and consider is these are full network copies of the Virtual Machines. They must be shut down in order to migrate them between vSphere, or your various vCloud setups. Also if you have not read my series on the Clone Wars, it may be useful since some of the data around copying to and from transfer spaces is interesting. If you have not let’s take a quick look at the process that vCloud Connector does to facilitate the moves.
- The Virtual Machine is Exported from the source location and temporarily stored on the vCloud Connector Node’s local space
- Once the export has completed from the source an import is initiated to the destination
- If the destination is a vCloud infrastructure, the data will be moved through the vCloud Cell’s “Transfer Space” located at /opt/vmware/vcloud-director/data/transfer
- The imported Virtual Machine will then be placed into the vCloud Director instance as a new vApp and the transfer space will be cleaned up.
The reason the Clone Wars series is important is to understand that on a local private cloud the transfer between vCloud, the transfer space and the final storage on ESX is all network copy based. On a provider cloud like Virtacore or others, you will also have that copy going over the internet. So basically, these things can take time to move.
Moving Your Workloads
I want to point out a couple of key changes from vCloud Connector 1.0 and 1.5 as it works today.
- You MUST have Organization Catalogs available in order to copy between clouds.
- The underlying vCloud Director import/export functions use the catalog as a transport mechanism.
- If you do not have any Organization Catalogs you will not be able to copy. In the situation with public cloud providers you may need to have one created if there is not one present. I actually found this with Virtacore, but my account was created a while back. New accounts should be coming with at least one catalog on your Organization to facilitate this. If there is not one just contact the support chains for your provider.
The process is multi-step where vCloud Connector 1.0 did some of the steps for you. What I mean is you have to do the following to get a vApp workload completely moved from one cloud to another.
- Copy the vApp to the remote vCloud Catalog
- Deploy the vApp from the Catalog using vCloud Connector or the vCloud Portal
- Configure and test the vApp now in the new Cloud
- Remove the Catalog item if you do not need it going forward
This may seem like more steps than with vCloud Connector 1.0, but this actually allows you to re-deploy the vApp should you have to for any reason before you remove it from the Catalog. Only once you are sure you’re vApp is in the new cloud and functioning will you want to clean up and remove it. This way you don’t have to do the entire process again.
From vCenter to vCloud
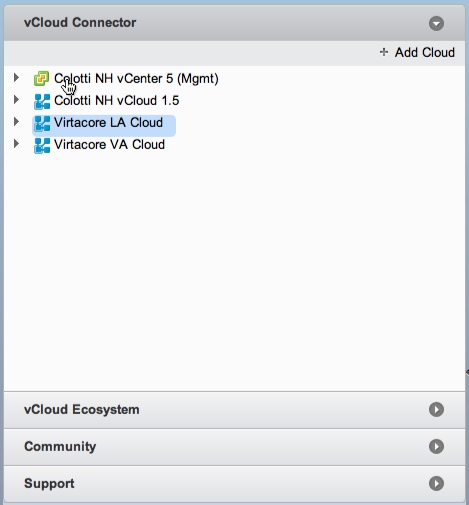
At this point in the game we will assume you are ready to move some workloads around. For my test purposes I created an empty test VIrtual Machine on vSphere with a VERY small virtual disk, and no operating system installed. I did this purely to see the movement, and not have to wait for 20 or 30 gigabyte to copy. Below is the screenshot of all my clouds I setup in Part One, so the first thing to do is move a template from vSphere to my local vCloud Director.
First we expand the vCenter object and locate the test template I created directly in vSphere by selecting the vCenter, then making sure I am on the template tab since this test object is an actual vCenter Template. It is worth noting as well that this vCenter is actually the vCenter appliance, so that also works with vCloud Connector.
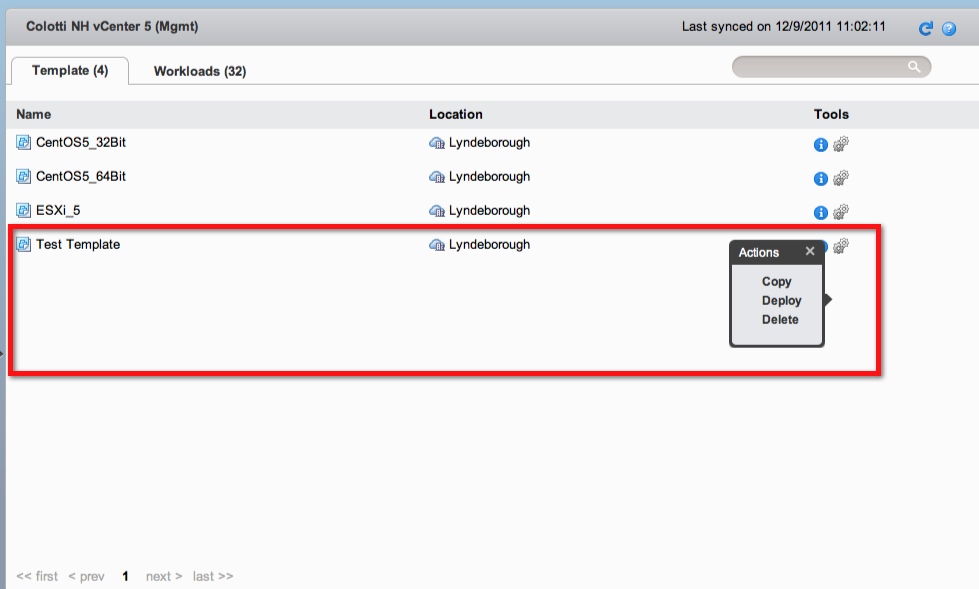
If you want, you can also deploy this from vCloud Connector, but we will copy it to my local on Premise cloud first then move it to the public cloud. When we select “Copy” We are given the options box.
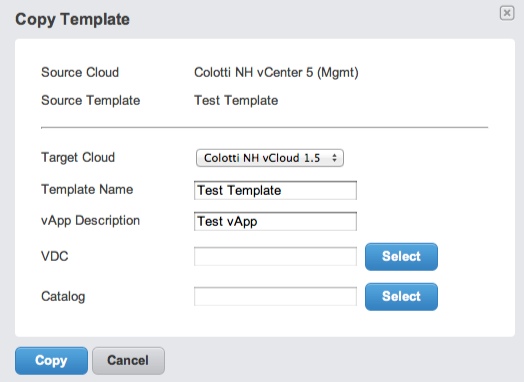
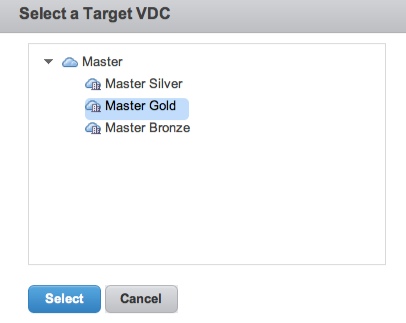
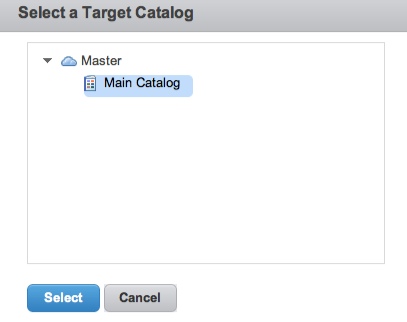
Now we can also select the VDC import
Now we can also sect the Catalog for the import and select “Copy”
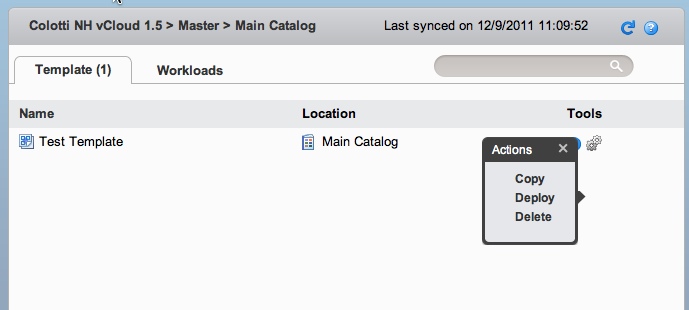
What we see is that the copy exports from vCenter and completes the import to the vCloud Catalog.
![]()


With a refresh of the vCloud connector view we can see the template in the catalog of vCloud Connector’s interface and we are ready to deploy it for use by selecting the deploy option. However, I will jump over to moving a workload from a Private vCloud to a public vCloud as that may be more interesting.
From Private to Public vCloud
Now comes the fun part. As before I am using my Virtacore vCloud Express account to move the workload from my on premise vCloud to the Public vCloud. The process is similar to the vCenter move, but now we are going vCloud to vCloud via the internet instead of local network. Remember that depending on your provider you may have multiple vCloud’s behind their portal as is the case with Virtacore. Therefore if you have a true template, you may want it on both vCloud’s for local deployment. If your workload is an actual vApp, you can decide which cloud you want to run it in. Again you need to ensure you have a Catalog available in both your provider based vCloud’s for this to work.
First we select the “Production” workload from the local Private vCloud on premise and copy it to the remote vCloud Catalog.
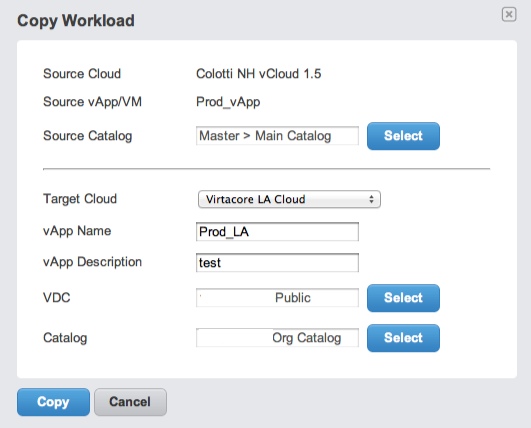
The same as before only now you see the source is my local vCloud and the target vCloud is the Virtacore Los Angeles in my Public vDC on my Organization Catalog. We also see in the vCloud Connector interface the progress of the copy. As a reminder, I am using a test Virtual Machine with only a 25MB virtual disk to make this go quicker for test purposes.
![]()
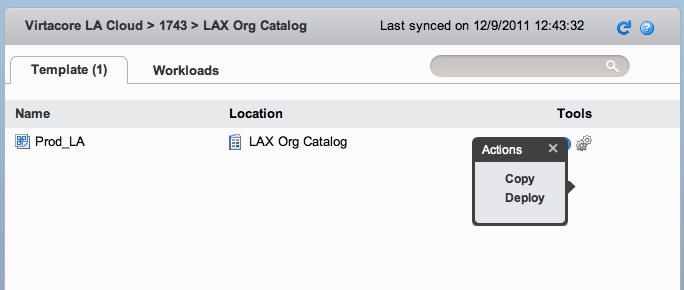
Once this process is completed, I could run another copy from my on premise to the remote vCloud to have this same vApp available on the Virtacore Virginia vCloud Express location, or I could copy it from the LA to VA vClouds and let the Virtacore network handle the transport. Instead I am going to simply deploy it to the LA vCloud.
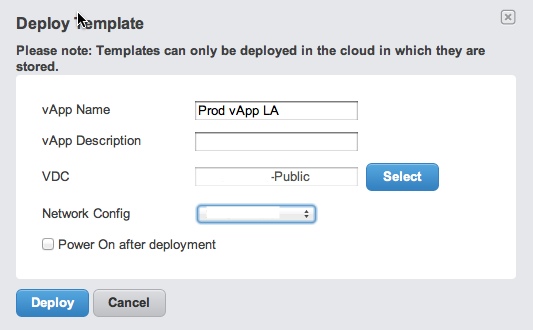
Here I get my options for deployment to the vCloud in LA so I can deploy it from the Catalog. I can select my vDC, name the vApp, as well as select the network from the options available.
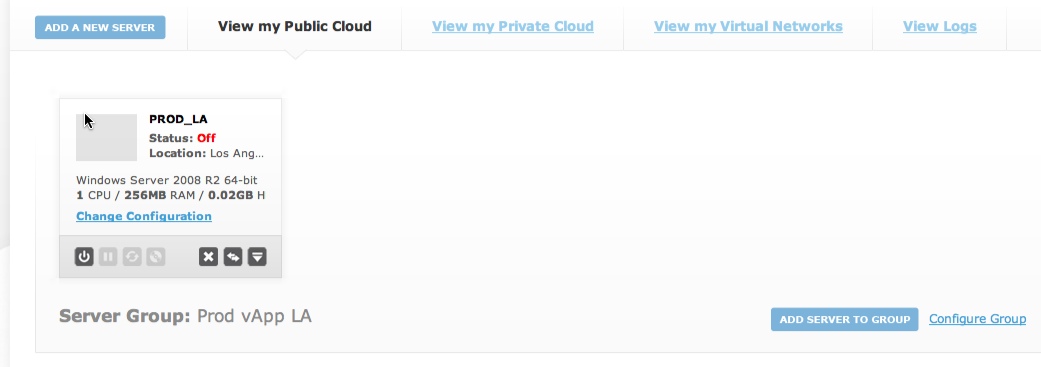
Once deployed it will show up in the Virtacore portal as a new vApp for me to power on and manage as I see fit. I did find out the Virtacore portal does have a caching setup so it may take a couple of minutes for it to show up, but it will.
At this point I can configure my vApp and when I am done I can use vCloud Connector to remove the version of the template in the Catalog. Again you may want to have a copy in your other hosted vCloud for future use, or you can remove it completely
Summary Review
What all this testing has shown me is that the combination of a hosted provider like Virtacore along with the vCloud Connector architecture provides a pretty powerful way to move workloads between clouds. There are a few things you need to understand and get used to in the way of the architecture, user interfaces and other aspects. Once you nail those down you can start copying workloads between your clouds and at the very least get copies of your templates and vApps into a public cloud provider to experiment. What this has also done is allow me to take feedback of my findings back to the vCloud Connector team as feedback to possible adjustments in the future.
The key to remember is this is slightly different from the 1.0 product in the sense that you have to copy, deploy, and remove the vApp and that Catalog’s are required to facilitate the moves. As with Part One, I wanted to thank Virtacore for being kind enough to provide me the public cloud space for this testing, and let you know they are offering $50 off the initial use of their vCloud Express product so folks can give it a shot. Just use the code STEKREF when you sign up to get the offer if you sign up and check out their new portal as well.