
Last week I was chatting in the OMBI Discord channel about CloudFlare in general and someone turned me on to the use of their free tunnels. I was not sure what it was all about so down the rabbit hole I decided to go. What became fascinating to me was how useful they can be for your self hosted web apps. Traditionally we know you always had to open up firewall ports and add port forwarding, change ports, and all that to access these things. By using these new free CloudFlare Tunnels you don’t need ANY of that including the open ports on your local firewalls. I poked around and found some information on how to set them up, but I wanted to simplify it for others that want to try it. So read on!
The Old Ways Of Accessing Self-Hosted Apps
There’s always been a couple of ways to access your home lab or self hosted web apps. The “old” way has always been to just open random ports on your firewall and port forward to the application as show below.
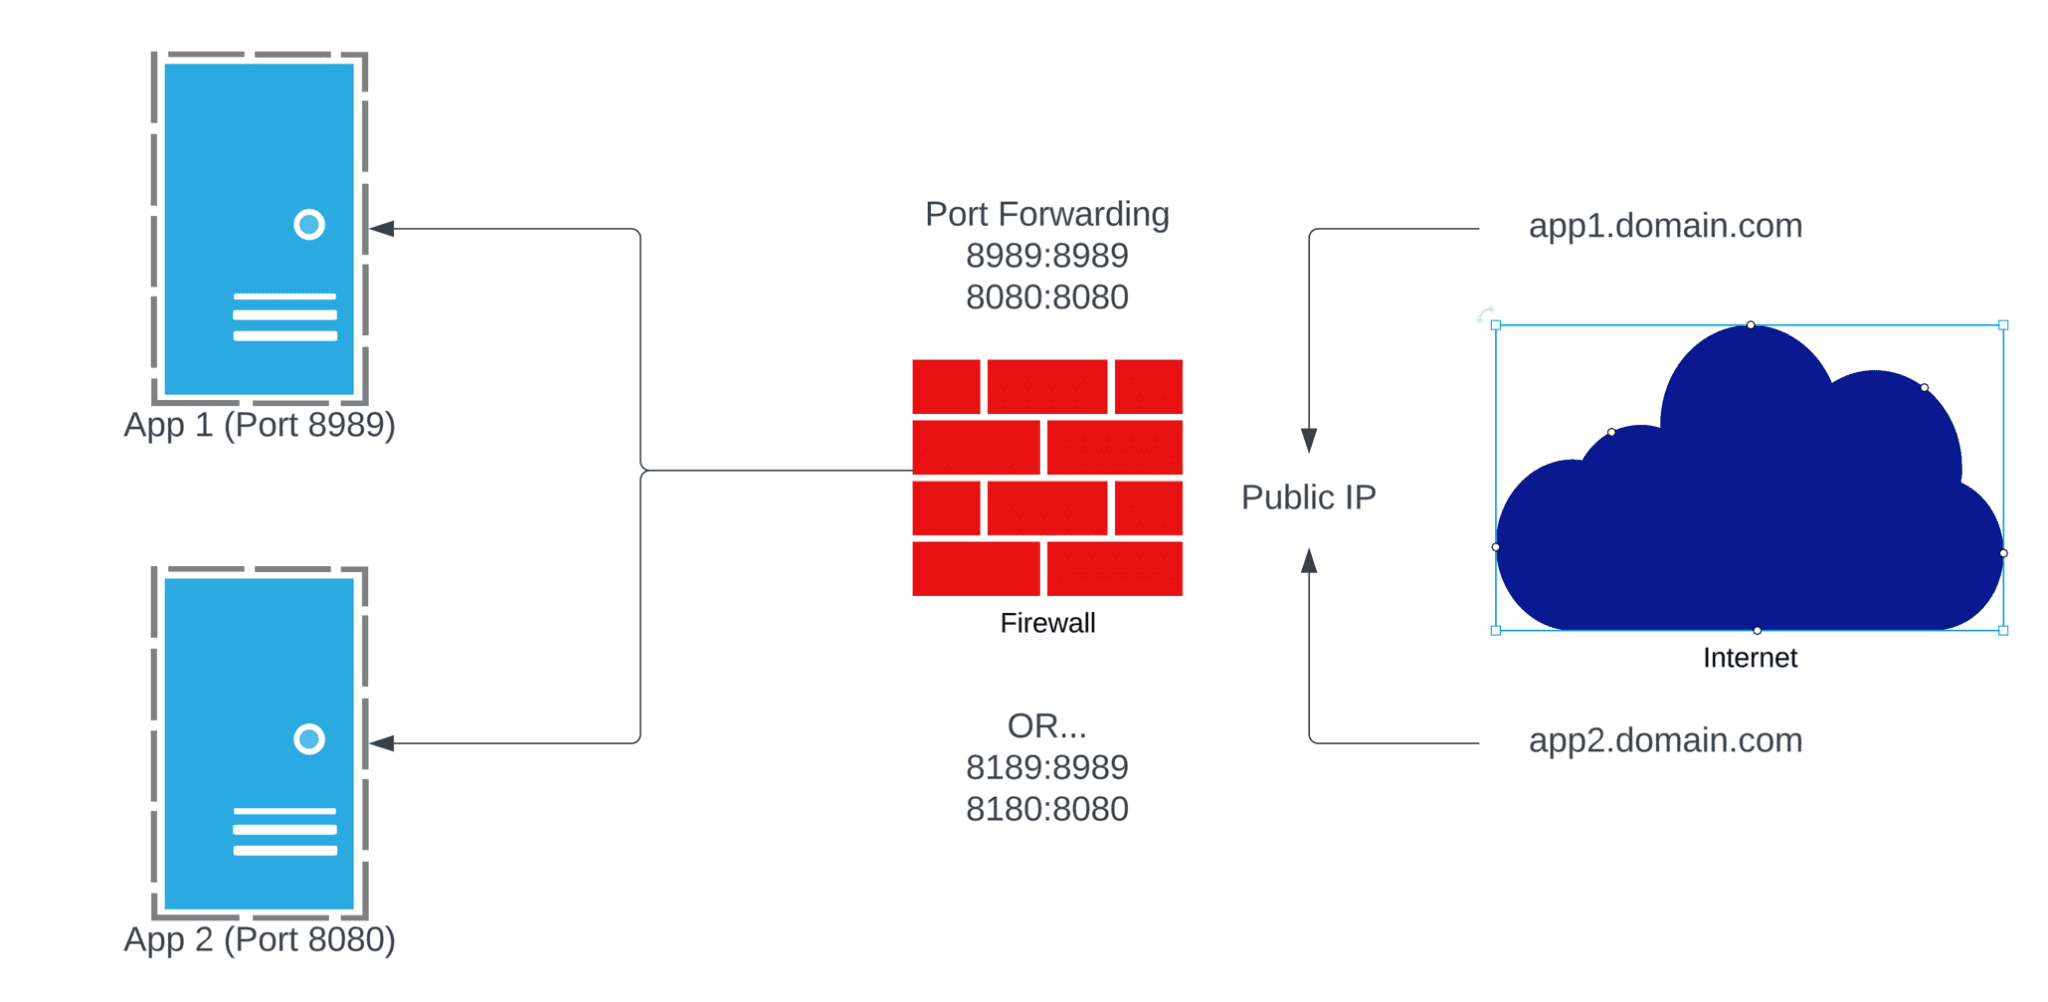
Now this always worked without an issue, but you needed to then run some Dynamic DNS as well, and you were basically exposing ports that would show up on a port scan. It works but it’s what I call the “old way” of doing it.
Many people myself moved to a “better” way which was to close all the random ports and only open 80/443 passed to a reverse proxy. That proxy would sit on a separate VLAN with control rules between it and the back end apps.
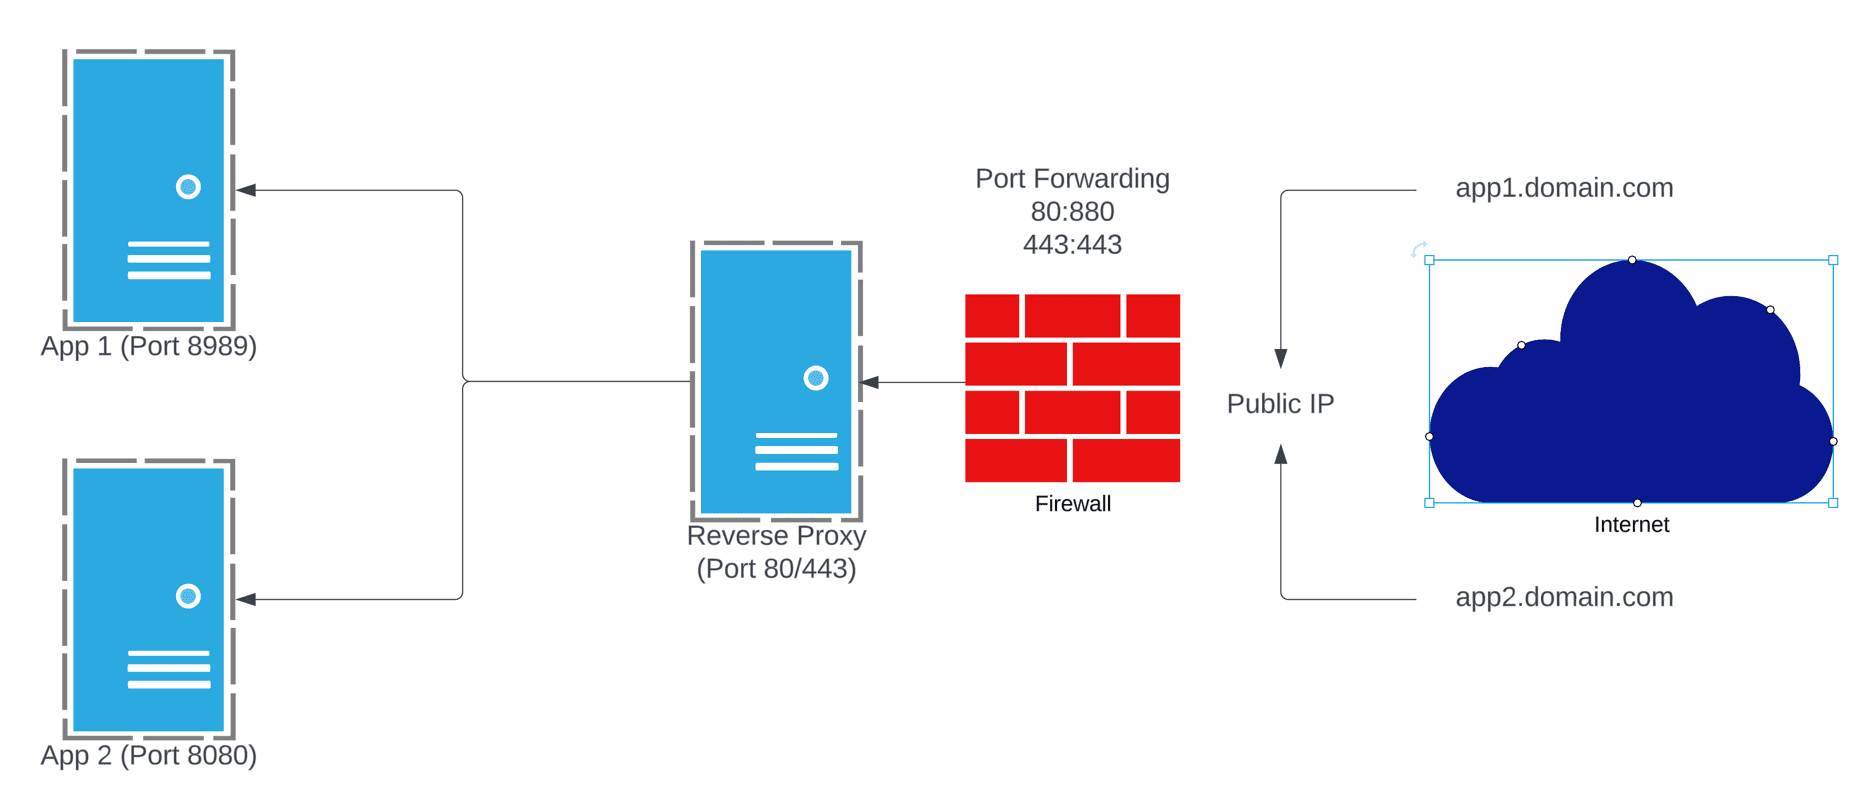
Now this worked a lot better, provided a single point of access, and in some sense much better control and security. However, you were still opening inbound access to a network with the revers proxy, so a port scan of your public IP would reveal that was open. So what if we could CLOSE all those common ports and still get access to all our apps? That’s where CloudFlare Tunnels come in.
CloudFlare Tunnels: The New Hotness for Self Hosted Apps
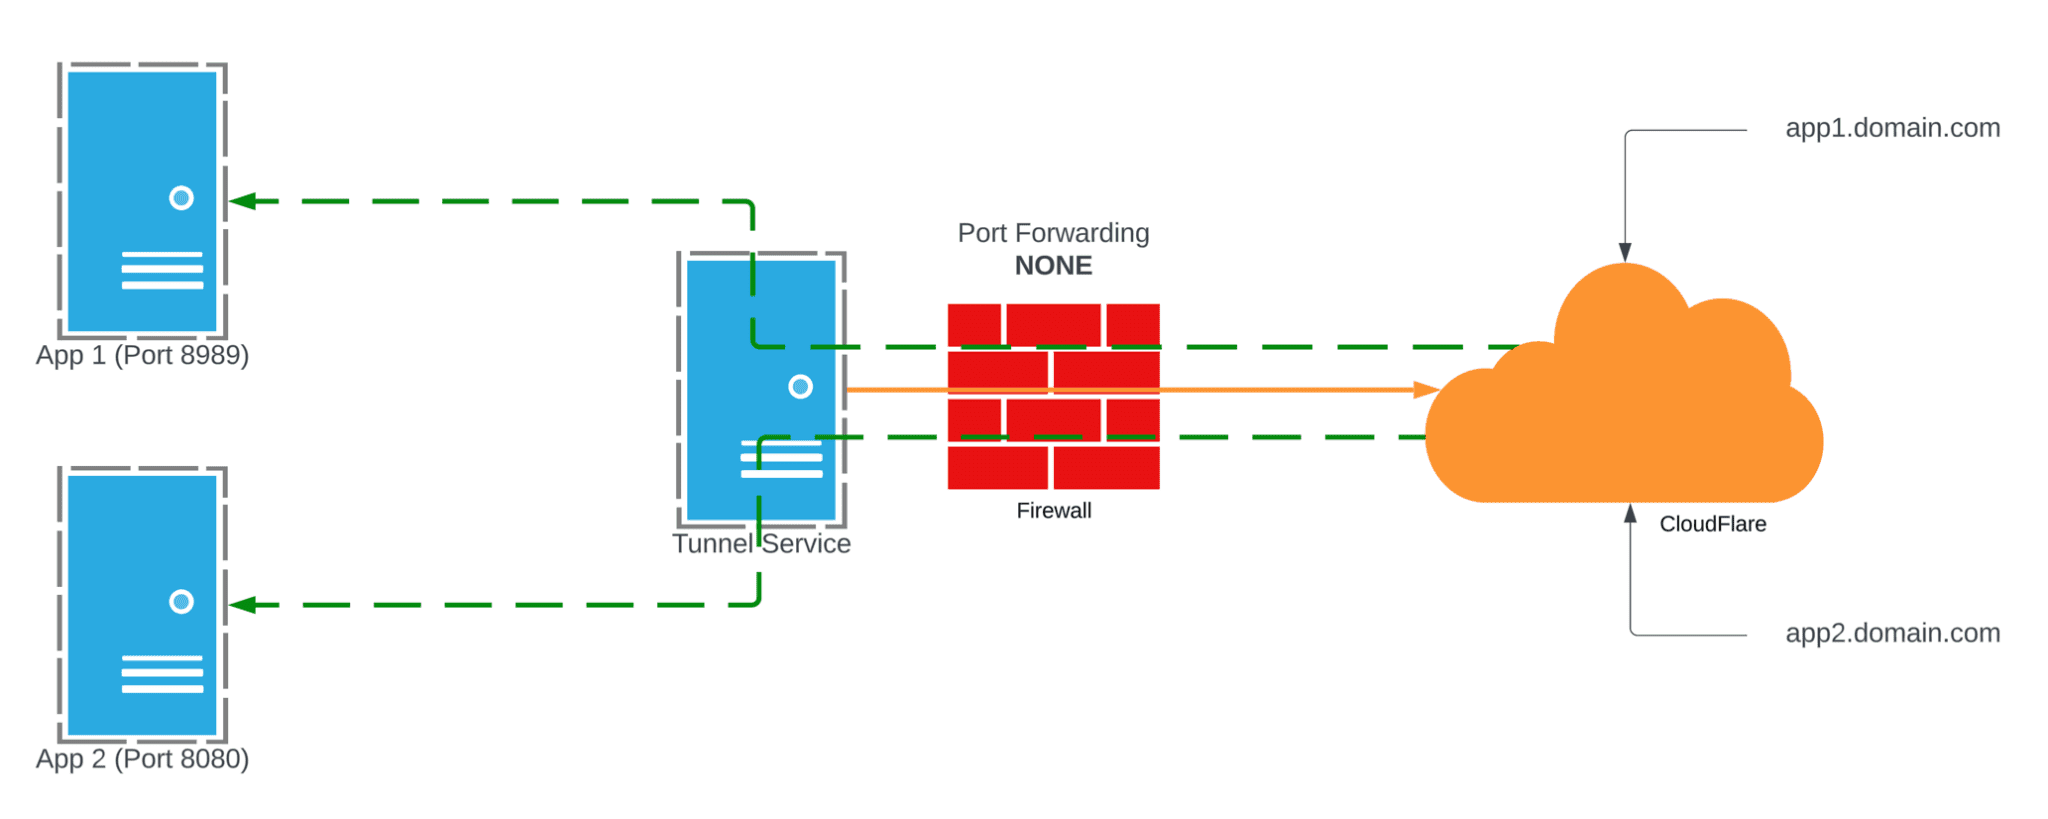
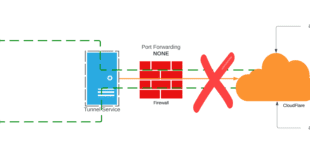
This method completely flips the script…literally. Instead of allowing traffic IN to your network, you deploy one or more “Connectors” in each source site. These connectors establish a secure connection to the CloudFlare network and bring up a tunnel. One that is in place you can add external hostnames on any domain you have in CloudFlare DNS. It takes minutes to get things running and with this alone you achieve the same en result of exposing an application to the internet, but you no longer have ports open! How cool is that? Yes this requires using CloudFlare for DNS, but many of us already do that to take advantage of their global CDN.
CloudFlare Tunnels: How To Create Them
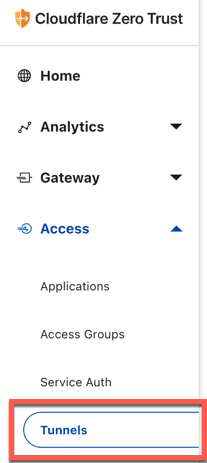
This is well documented but here is a brief walk though of the process. For my use I decided to simple create a tunnel in the CloudFlare Zero Trust Web interface and bring up a docker container. What I did learn is you only need one container “per source IP” like your house of an office network, or colo. You can then run multiple application hostnames over that tunnel. Once you setup Zero Trust in your account go to Access–>Tunnels on the menu.
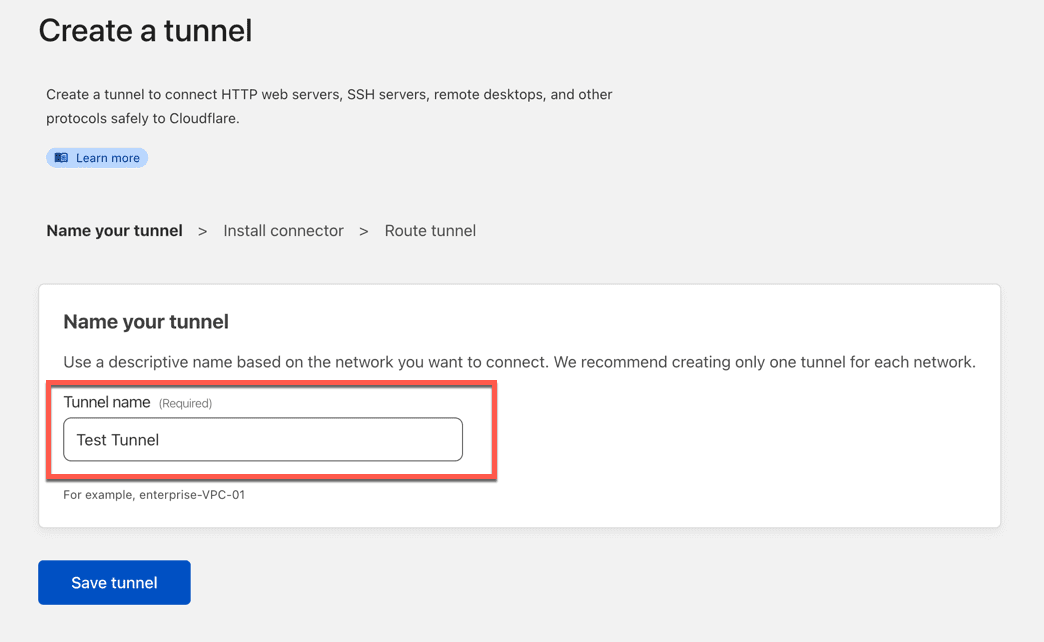
From there click Create a Tunnel and you will get the creation wizard which is all of three steps. First give the tunnel a name.
Next determine how you want to install the connector that is easiest for you. In my case docker was the easiest but you can see there are commands for multiple options.
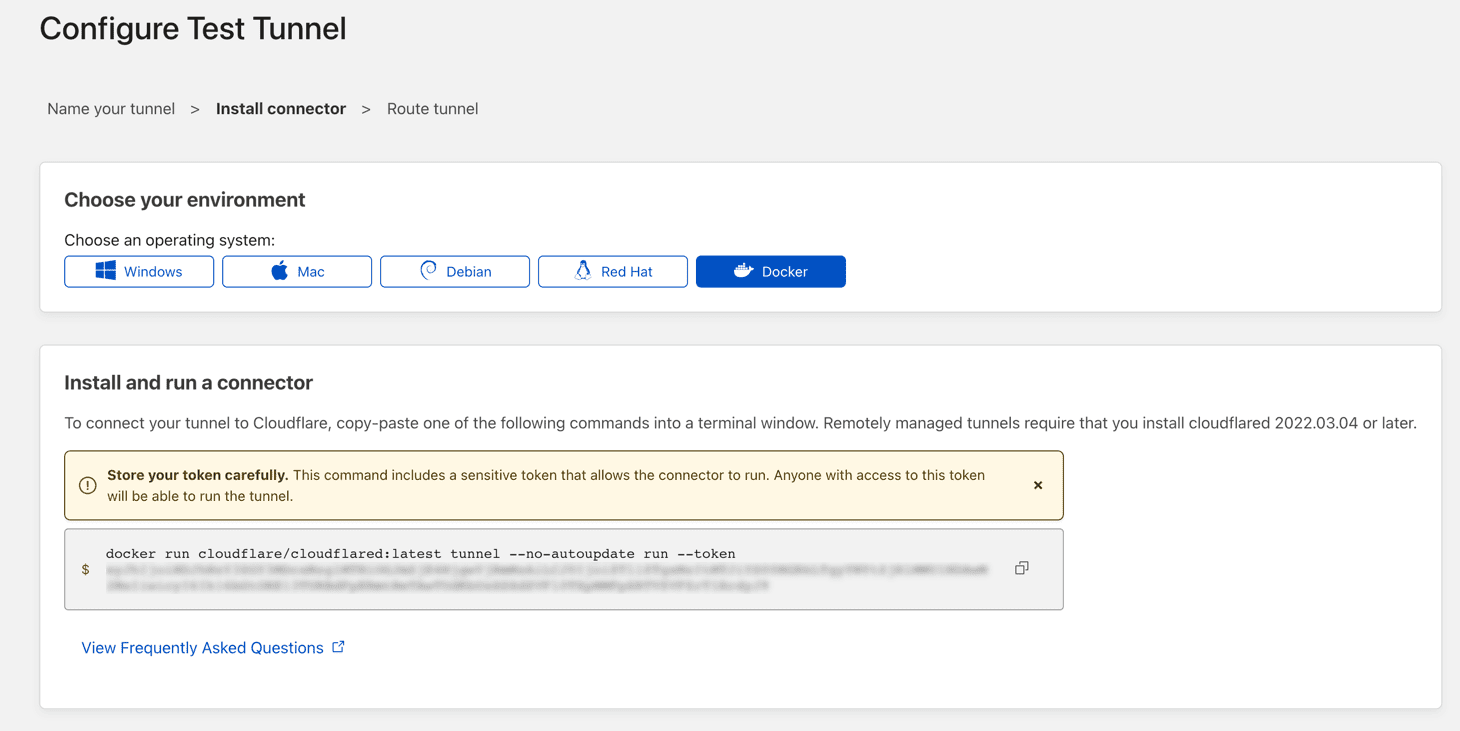
The key to any of the methods is the token. If you pause here and deploy it there is a window below this where the tunnel will show up almost instantly. You can also deploy this with Docker Compose as well. The last step is to simply assign at least one application route.
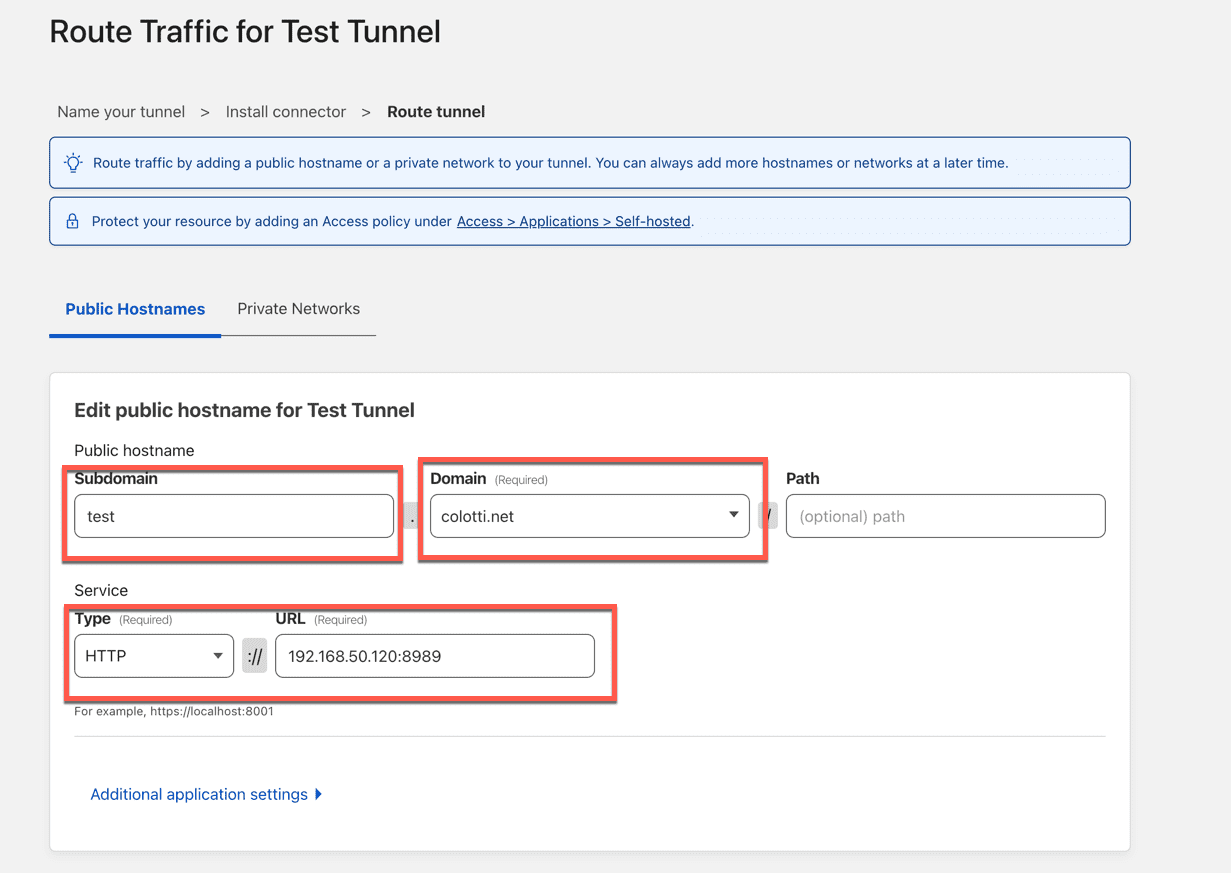
The key here is as long as the connector container or device is on a network that is routable to the service, it will work. Also in this case you CAN deply the local service as HTTP or HTTPS, they even support SSH and RDP too. Those are a little more to setup so let’s stick with a basic web app. This will create both the proxied DNS entry and the corresponding route in your CloudFlare DNS for you. At this point your app.domain.com will be accessible on via the hostname, same as it was with you old reverse proxy!
CloudFlare Tunnels: Multiple Connector Redundancy
This is something I did find out works great. In my case I have a bare metal Docker host in a remote colocation. I did use the docker container for the initial tunnel to access my apps like Portainer. Then I realized, how would I update the tunnel container, via Portainer while I was access the UI over the tunnel? It has to be bought down to update the image.
Well that was easy to solve. I simply used the Linux installer for the SAME tunnel which uses the same token and installed that service on the bare metal host outside of Docker-CE.

Now you can see there are two connectors for the one tunnel and this is near seamless. I can connect to Portainer and down the container update the image, and bring it back up without losing connection. I can then SSH (via a tunnel) and do the same on the service on the bare metal host. Simple, effective, and it just work.
CloudFlare Tunnels: Conclusions and Next Steps
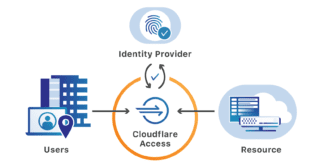
At this point I have converted all my web applications to running via these tunnels. I would challenge anyone to try this being they are free. I am sure most homelab folks can use this and better their own personal security posture. The next step which I setup and I will post separately about is adding CloudFlare Access to your apps. This can be done with apps that are over a tunnel or just using the standard CloudFlare DNS Proxy such as for WordPress. More to come on that.
I wish to allow my users to use Ombi to request content from my Plex Server. Cloudfare tunnels sounds like a good means of providing them that access to Ombi. Do yiu have references that give step by step instrrucions on setting this up on a Windows 10 PC?
Yes many folks use the tunnels for OMBI and other app access without the need for VPN or reverse proxy. I do not have any references for windows setups I do everything in Docker, but CloudFare has excellent documentation to get the tunnels up and running and then you can combine with CloudFlare Access if you want to add to it. I am sure there are other blogs/references out there and tunnels has been discussed in the OMBI discord many times as well. Getting the tunnel “up” is easy then you have to play with mapping the URLs and apps in CloudFlare Access. I am starting up a new business so won’t have much time going forward to mess with things like this as I have in the past. You should be able to get it going with a little research but it is “easier” and “cleaner” than messing with reverse proxies IMO.